Share educational material and maintain authorship
As detailed in [1] generating educational material requires a significant effort both for its initial development and to keep it updated.
Although there is the reusability paradox [2] - [3] which postulates that a teaching material will be more reusable when it is as generic as possible and more effective when it is personalized for a particular audience in a particular context [4]; sharing our material in a way that other people can find it, use it, improve it, and cite it is an activity worth the effort.
With the advent of forced virtuality due to COVID-19, many teachers have found it necessary to share their material in a digital format, in addition to having to adapt some part of it.
Both in [1] and [5], it is mentioned that treating the lessons as a community resource to be gradually updated, adapted and improved can increase the quality of educational material and free up valuable time for teachers in designing their own material. Not only would we be helping our colleagues, but we can also add benefits for students who can access our material at no cost and when they need it. Finally we would have a citable product, that is, we could ask for and obtain credit for the material that we have developed, and we could also know who is using this material and where.
So if I want to share my didactic material, how do I do it? Keep reading and we will tell you
Three simple steps to share lessons
- Step 1: select an open license that makes it clear how to use the material. The most used licenses are known as Creative Commons licenses. There are different types of licenses depending on what we want the user of our materials to be able to do with them. If we do not know very well which license best suits our needs, there is a license selector that can help us.
If our material has code in a programming language, then we must also select an open license, designed for software. I suggest the license MIT or, considering the impact that software and data science have on our lives, the Hippocratic license, that allows the code to be freely used as long as the user is not violating basic human rights treaties.
-
Step 2: store the material in a repository that allows us to publish it. One place that allows us to do this is GitHub which is used to develop a variety of materials because it allows us to have different types of content such as slides, documents, source code, images, and also allows us to continuously develop them through an iterative process and with input from others, since GitHub implements a version control system. If you haven’t used GitHub, you can use this initial Git tutorial.
-
Step 3: add a digital object identifier (DOI) so that it is citable. We will describe this step in great detail by following these GitHub instructions.
-
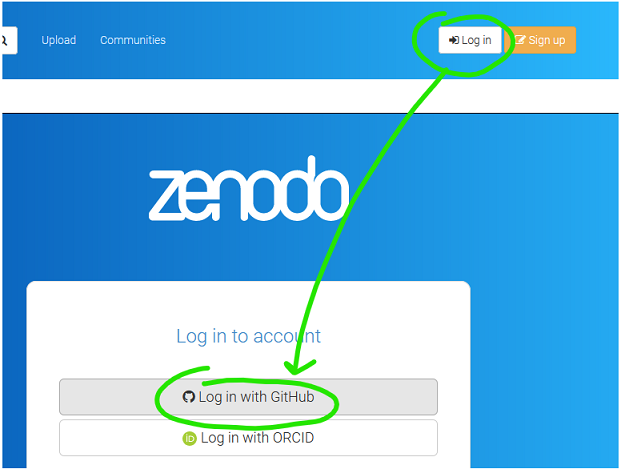
Navigate to Zenodo, press the Login button at the top right of the page, and select the option to log in with your GitHub account.
-
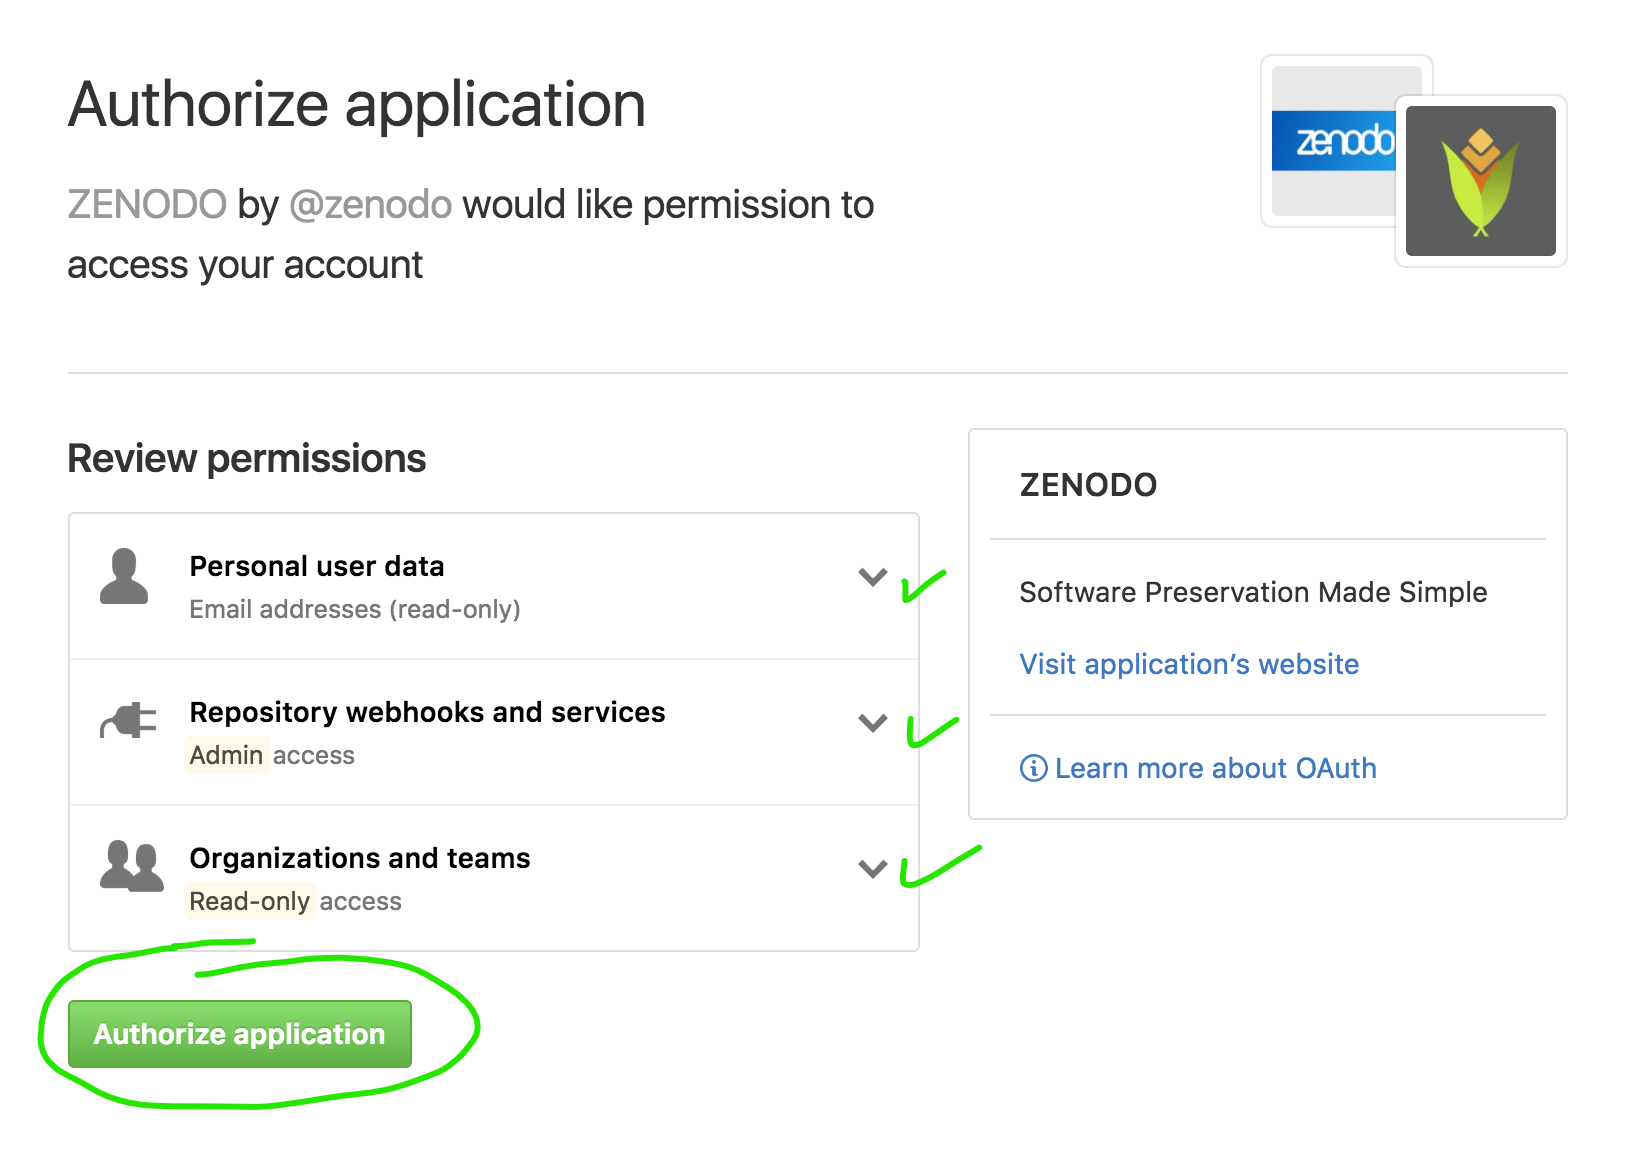
We must authorize the application to grant Zenodo the permissions it needs to be able to assign a DOI to your repository.
-
After confirming that it is our account (we will receive an email), we will be logged into Zenodo and in the upper right corner our email associated with GitHub appears, if we click on the triangle a menu is displayed where we select GitHub:

-
Now, choose the repository you want to archive. To enable this functionality we click on the Activate button next to the repository (in this case GEE_course_code). The repository must be public.

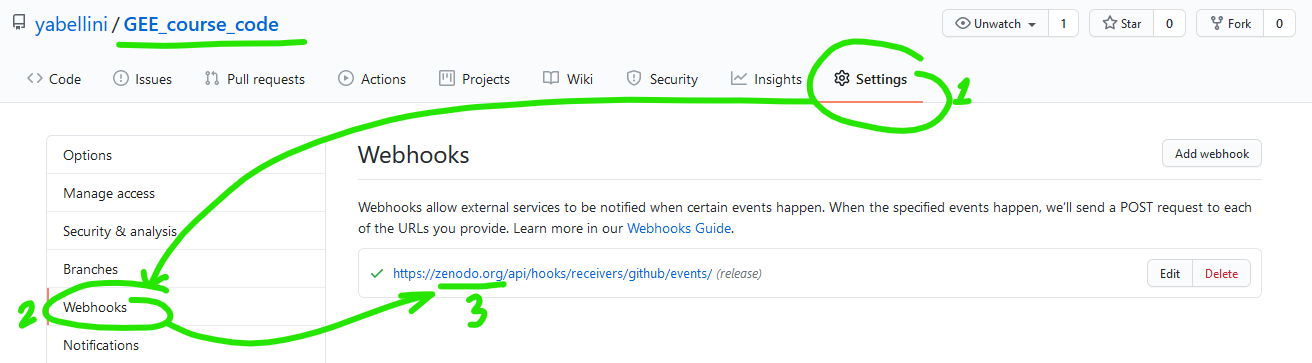
- We must verify that the repository configuration to send messages to Zenodo was successful, for that we click on the configuration tab in your repository and then click on Webhooks in the menu on the left. You should see a screen similar to the following image:
-
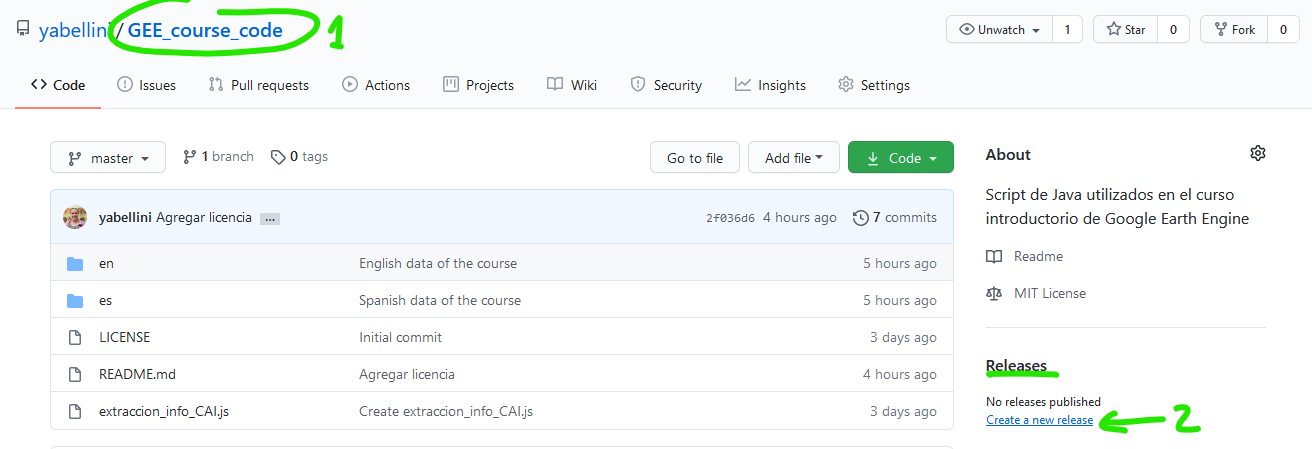
Create a new version: Zenodo archives your repository every time you generate a new version. For this we return to the main view of the repository and in the menu on the right we click on create new release.
-
We must fill in the version of this release, the title, and the description, and then press the button publish release, as shown in the following figure.

-
Now we are going to obtain the DOI, for that we must return to Zenodo and click on Upload where it will show us the different materials that we have published in Zenodo. If we click on the name, it shows us all the details, we can edit the information, and if we go down on the page to the right it shows us the DOI and a suggested cite.
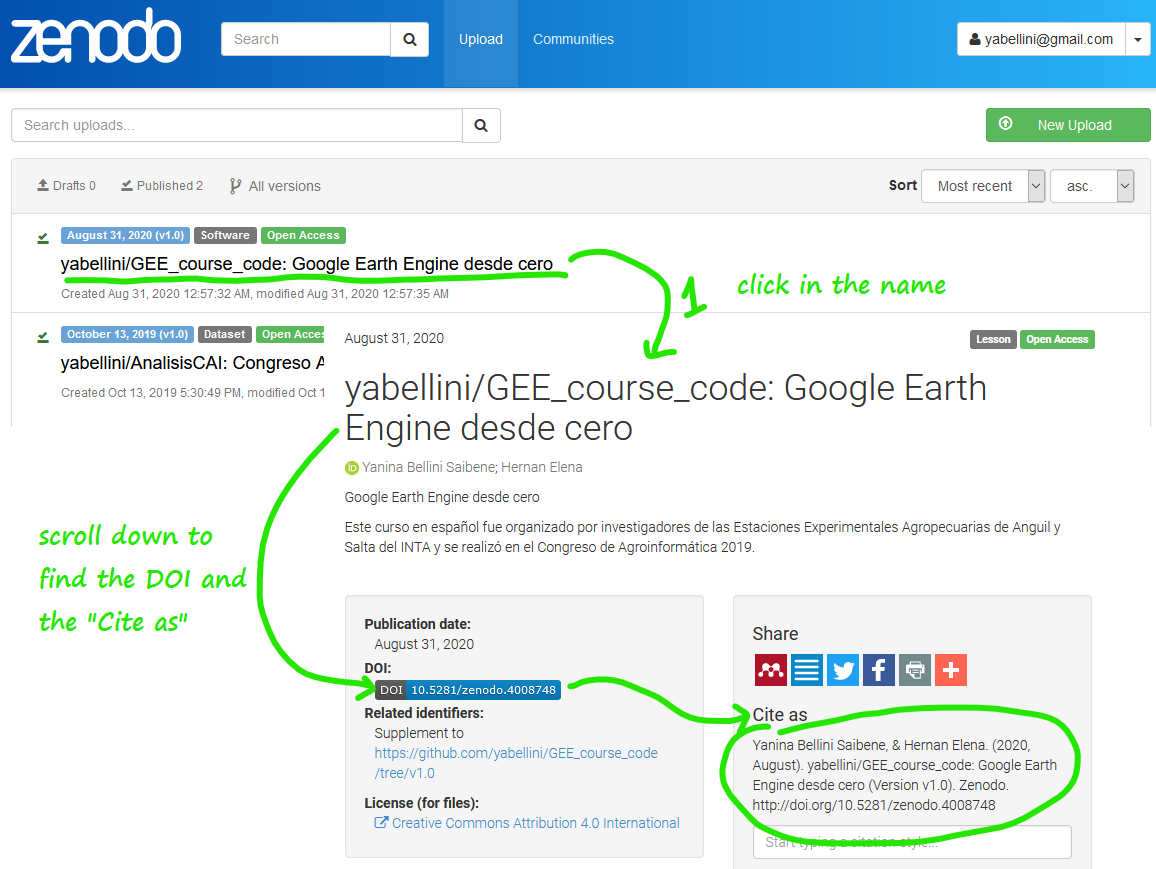
-
Done, now we have the DOI and the “cite as” that we can add to our repo and ask those who use our materials to use, to mention us.
Thanks to Silvia Canelón for review the English in this post.